Fix Windows 10 Black Screen with Cursor after/before Login
If you are also a Windows 10 user, you may have encountered, or could potentially experience in the future, the concerning issue known as the Windows 10 black screen with cursor. The Windows 10 system’s display could sometimes go black, creating trouble. Whether you are working on essential computing tasks or just playing your favorite games, the Windows 10 black screen with cursor before login can be frustrating. To get over this, we have arranged a few solutions for your ease in this step-by-step guide.

- Part 1. Issues Statement: Windows 10 Black Screen with Cursor
- Part 2. How-to Solution: Fix Windows 10 Black Screen With Cursor with 16 Ways
- Part 2.1 Restart PC
- Part 2.2 Disable the App Readiness
- Part 2.3 Uninstall the Display Drivers
- Part 2.4 Add/Login A New User Account
- Part 2.5 Perform Clean Boot
- Part 2.6 Turn Off Fast Startup
- Part 2.7 Update Graphics Card
- Part 2.8 Update Your BIOS
- Part 2.9 Remove Problematic Software
- Part 2.10 Run Automatic Repair
- Part 2.11 Perform System Image Recovery
- Part 2.12 Run SFC and DISM
- Part 2.13 Remove the Battery
- Part 2.14 Switching the Display
- Part 2.15 Open Windows 10 Explorer via Task Manager
- Part 2.16 Turn on low-resolution video
Part 1: Issues Statement: Windows 10 Black Screen with Cursor
A black screen with a cursor is a critical issue but is relatively common in Windows 10. There could be two scenarios for this issue: first is when the user can log in to the Windows but none of the GUI is visible. The second is when the user is not able to log in, and the Windows is not bypassing the booting phase.
Some possible causes of black screen Windows 10 with a cursor could be:
- Corrupted Windows Update: Many a time, the Windows update comes corrupted and results in a black screen error along with various bugs.
- Outdated BIOS: The BIOS helps connect the hardware to the computer system. Hence, outdated BIOS could be the main reason for connection issues.
- Damaged Graphics Driver: When the files get corrupted in the device drivers, the Windows 10 black screen issue can occur.
- Battery Issue: If you’re using a laptop, its battery could get damaged or outdated, which results in the malfunctioning of Windows 10.
- Human Error: You may have accidentally deleted or changed system files that are interrupting with system boot.
If any of these issues occur, anyone can easily fix it if proper troubleshooting steps are followed. Now let’s explore the solutions to get a Windows 10 black screen with cursor fixed.
Part 2: How-to Solution: Fix Windows 10 Black Screen With Cursor with 16 Ways
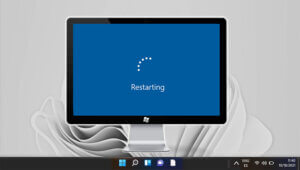
2.1 Restart PC
Your desktop or laptop must be completely shut down and restarted to resolve the “Black screen with cursor” issue on Windows 10. So:
Step 1: Press the power button for 8–10 seconds.
Step 2: Disconnect all peripherals from your computer, including the power cord. If you’re using a laptop, remove the battery.
Step 3: Reconnect the power cord and only attach essential devices like a keyboard, mouse, or monitor.
Step 4: Power on your computer.
2.2 Disable the App Readiness
Disabling the “App Readiness” service is an alternative solution for the Windows 10 black screen issue on system login. For that, follow the below steps:
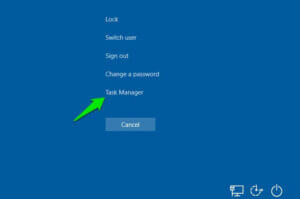
Step 1: On the black screen, press “Ctrl+ Alt +Delete” and choose “Task Manager”.
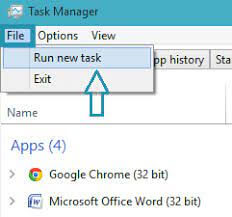
Step 2: In the “File” menu, select “Run new task”.
Step 3: Then type “services. msc” and click “OK”.
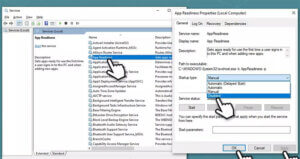
Step 4: From the “Services” list, select the “App Readiness” property.
Step 5: Set the “Startup type” to “Disabled” and click “OK”.
Step 6: Restart your PC.
2.3 Uninstall the Display Drivers
Uninstalling and reinstalling the display drivers could possibly help your PC or laptop to setup the right graphics hardware.
Step 1: On the black screen, press “Ctrl + Alt + Delete” and click on “Task Manager”.
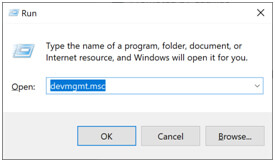
Step 2: Select “Run new task” under the “File” menu and type “devmgmt. msc”.
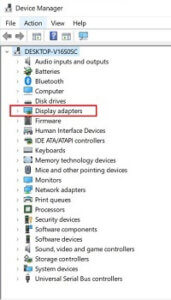
Step 3: In “Device Manager”, expand “Display Adapters”.
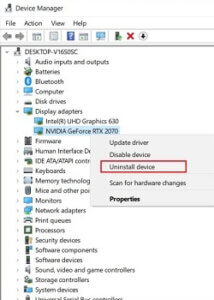
Step 4: Right-click on the installed display adapter, select “Uninstall device”, check “Delete the driver software for this device,” and click “Uninstall”.
Step 5: Reboot your computer to let Windows automatically reinstall the necessary drivers.
2.4 Add/Login A New User Account
If the black screen with a cursor problem is not yet solved, you may try adding a new user account without losing your valuable data.
Step 1: On the black screen, press “Ctrl + Alt + Delete”. Click on “Task Manager” and then from the “File” menu, select “Run a new task”.
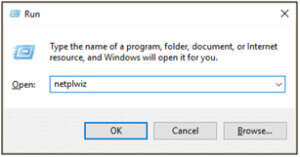
Step 2: Type the “netplwiz” command and press “Enter”.
Step 3: Select “Sign-in without a Microsoft account” and choose “Local account” on the next screen.
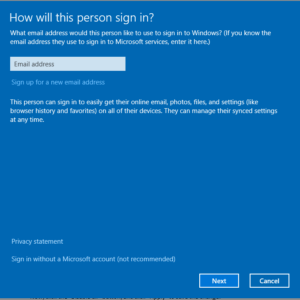
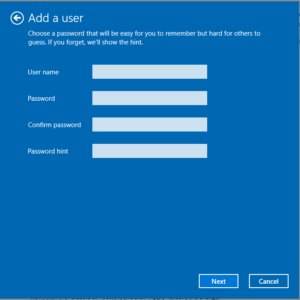
Step 4: Type an account name and a password of your choice, and click “Next” and “Finish”.
Step 5: In the “User Accounts” main window, select “New user” and click “Properties”.
Step 6: Select the “Group Membership” tab. Place a dot at “Administrator” and click “OK” twice to exit.
Step 7: Now, press “Ctrl + Alt + Del” again and click “Sign-out”.
After this, sign in using the new account. Now, if you can enter the desktop, proceed and transfer all your files from your old account to the new one.
2.5 Perform Clean Boot
Performing a clean boot can help you start Windows 10 through a set of drivers and startup programs, which can avoid software issues. To do that, you can use the below steps:
Step 1: Run Task Manager followed by “Run New Task” as we did in previous steps.
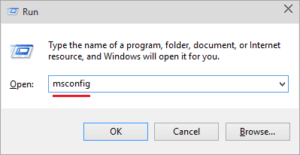
Step 2: Type and enter the “msconfig” command in the Run box.
Step 3: From the “Services” tab, click on “Hide All Microsoft Services”.
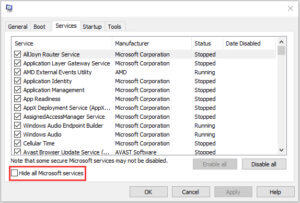
Step 4: Click the “Disable all” button and “Apply” to save the changes.
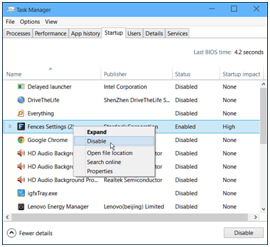
Step 5: Go to the “Task Manager” from the startup tab.
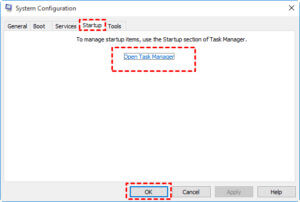
Step 6: In this, select the first enabled application and click “Disable”. Disable all enabled applications one by one and click “OK”.
Afterward, you can restart the computer again. If the “Windows 10 black screen with cursor” error doesn’t occur, then it indicates that one of the programs was causing this error.
2.6 Turn Off Fast Startup
To potentially resolve the “black screen with cursor Windows 10” issue, you can disable Fast Startup by following these steps:
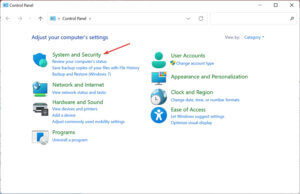
Step 1: Run Windows in Safe Mode. Now, on the search panel in the taskbar, open the “Control Panel” and access the “System Security” > “Power Options” section.
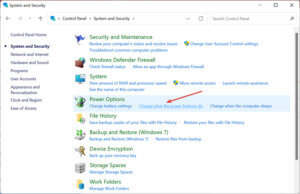
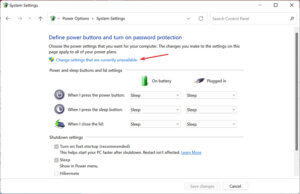
Step 2: In the left panel, select “Choose what the power buttons do”.
Step 3: Click on “Change settings that are currently unavailable”.
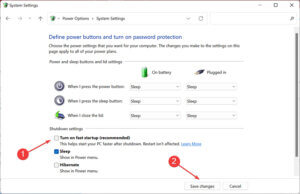
Step 4: Ensure that the “Turn on fast startup (recommended)” is unchecked.
Step 5: Click “Save changes” and then close the window.
2.7 Update Graphics Card
You can try resolving the “Windows 10 black screen with cursor” problem by uninstalling or updating your graphics card drivers if they are incorrect. To do so, here are the steps:
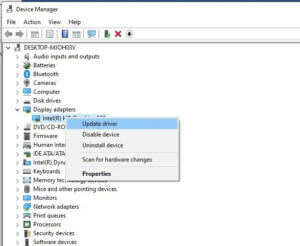
Step 1: Search and open “Device Manager” from the Windows search bar after running the PC in safe mode.
Step 2: Click “Display adaptors” and then right-click on the graphics device. Now, select the “Update driver” option.
Step 3: Select “Search automatically for updated driver software”.
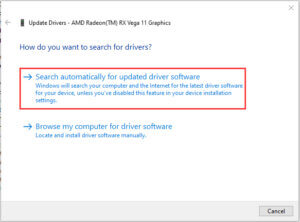
Windows will search and download any pending updates. Once done, you can see by restarting the PC if you have fixed the issue.
2.8 Update Your BIOS
To address the “Windows 10 black screen with cursor” issue caused by an outdated BIOS, upgrade your BIOS. Please note that updating the BIOS is an advanced procedure and carries some risks, including potential hardware damage not correctly performed.
Step 1: Press “F6” to start “Safe Mode”.
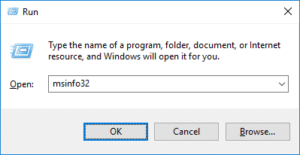
Step 2: Open the Run box and enter “msinfo32” to launch “System Information.”
Step 3: Download the latest BIOS version on your USB drive.

Step 4: It will restart your PC. Now, make sure to enter the BIOS once more with the USB flash drive with the most recent BIOS file. Then, look for the downloaded BIOS file and run the update.
Please note that you should not turn off the PC and disconnect the power while updating. This may lead to harmful results.
2.9 Remove Problematic Software
The problem-causing software should be removed from the PC, as it can result in a black screen issue with a cursor on Windows 10.
Step 1: Open your system in the “Safe Mode” by following the steps:
Press “Windows key + R” > enter “misconfig” command > “Boot” > “Safe Boot”.
Step 2: Once on the Home Screen of your Windows 10 system, use the shortcut “Windows + R” to access the “Run” command window.
Step 3: In the Run search box, type “appwiz. cpl” and click “OK”.
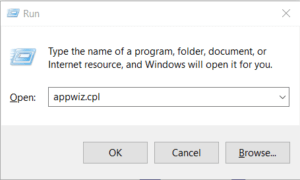
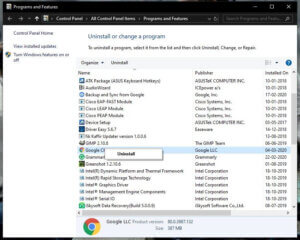
The “Programs & Features” window will be opened, and now you can remove any problematic software that’s causing a black screen on your PC.
2.10 Run Automatic Repair
Another option is to run the Automatic/Startup Repair in WinRE. Here’s how to do it:
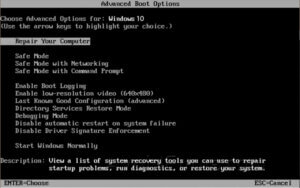
Step 1: Restart your laptop and keep pressing the F8 key until the “Advanced Boot Options” screen opens.
Step 2: Now select “Repair Your Computer” and then press “Enter”.
Step 3: Select your language and log in with your username and password. Choose “Startup Repair” from the list of options.
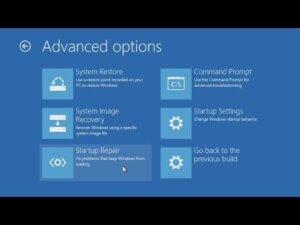
Step 4: By following on-screen instructions, finish the repair process.
2.11 Perform System Image Recovery
If you have already created a system backup, you can now perform a System Image Recovery in WinRE. Here’s a guide on how to do it:
Step 1: Select “Troubleshoot” in WinRE. Then select the “Advanced Options” menu.
Step 2: Now, select “System Image Recovery” and go along with the prompts to restore your system from the backup that you created.
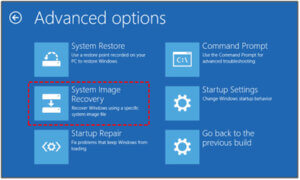
It’s important to note that this process will erase the data that has been added to your system since the backup was created, so make sure that you have saved any important files before proceeding.
2.12 Run SFC and DISM
If you’re experiencing issues with your Windows operating system, you may want to try running SFC and DISM in WinRE. Here are the steps to follow:
Step 1: Enter WinRE.
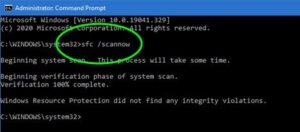
Step 2: Head to “Advanced Options” in “Troubleshoot” and then select “Command Prompt”.
Step 3: Now, enter the command “sfc /scannow”. Press the Enter key and wait for the process to get over.
Step 4: If this fails in any case, make sure to run DISM. To do so, type the commands mentioned below:
- exe /Online /Cleanup-image /Scanhealth
- exe /Online /Cleanup-image /Restorehealth
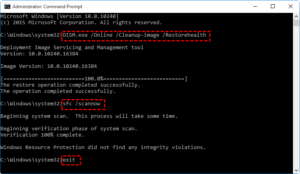
Once done, check if the problem is solved or not.
2.13 Remove the Battery
If you’re using a laptop and encountering the “Windows 10 black screen with cursor” issue, you can attempt to resolve it by removing the battery following these steps:
Step 1: Shut down your PC and remove its battery.
Step 2: Press the power button for 60 seconds.
Step 3: Reinsert the battery and restart your laptop.
If this solution doesn’t work or if you’re a desktop PC user, you can try the other fixes below.
2.14 Switching the Display
Troubleshooting a black screen issue can be solved by switching the display.
Step 1: Press the “Windows + P” shortcut to open the “Project” menu.
Step 2: The project menu will now open. Switch to the option from “PC Screen Only”.

Step 3: A few minutes later, switch back to the same option. Hope the problem will be fixed.
If the problem persists, you might have to repeat this step a few times.
2.15 Open Windows 10 Explorer via Task Manager
To force open Windows Explorer using the task manager, follow the steps below:
Step 1: Press the “Ctrl + Shift + Esc” keys simultaneously to open the Task Manager.
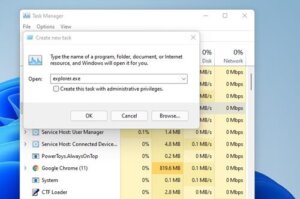
Step 2: Select the “File” and choose “Run new Task” from the “Task Manager” window.
Step 3: In the “Create new task” window, type “explorer.exe” and press Enter.
Install all available Windows updates and then restart your PC again to ensure that the “black screen” issue is solved.
2.16 Turn on low-resolution video
If you’re experiencing a black screen even though you have the correct driver, your resolution may be set to a non-supported value. To do so, simply follow these steps:
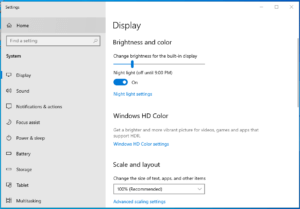
Step 1: Open “Display settings” from the PC’s settings.
Step 2: Then, under “Display resolution”, select a lower resolution that is supported by your monitor.
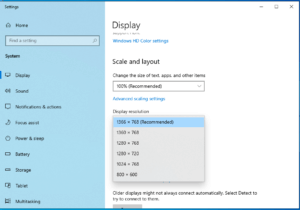
Step 3: Click “Apply” and then “Keep changes” to save the new setting.
Your PC or laptop should now display properly without any black screens.
Closing Remarks
Windows 10 black screen with cursor is a frustrating issue that can panic any user. But by following a few steps, you can quickly and conveniently fix it. The black screen in Windows 10 problem arises due to various causes, including, corrupted Windows update, outdated BIOS, interrupted connections, faulty software, and more. If you ever encounter this error, checking all the hardware connections should be your primary approach. If a normal screen does not appear, go for the software-based solutions listed in this article.